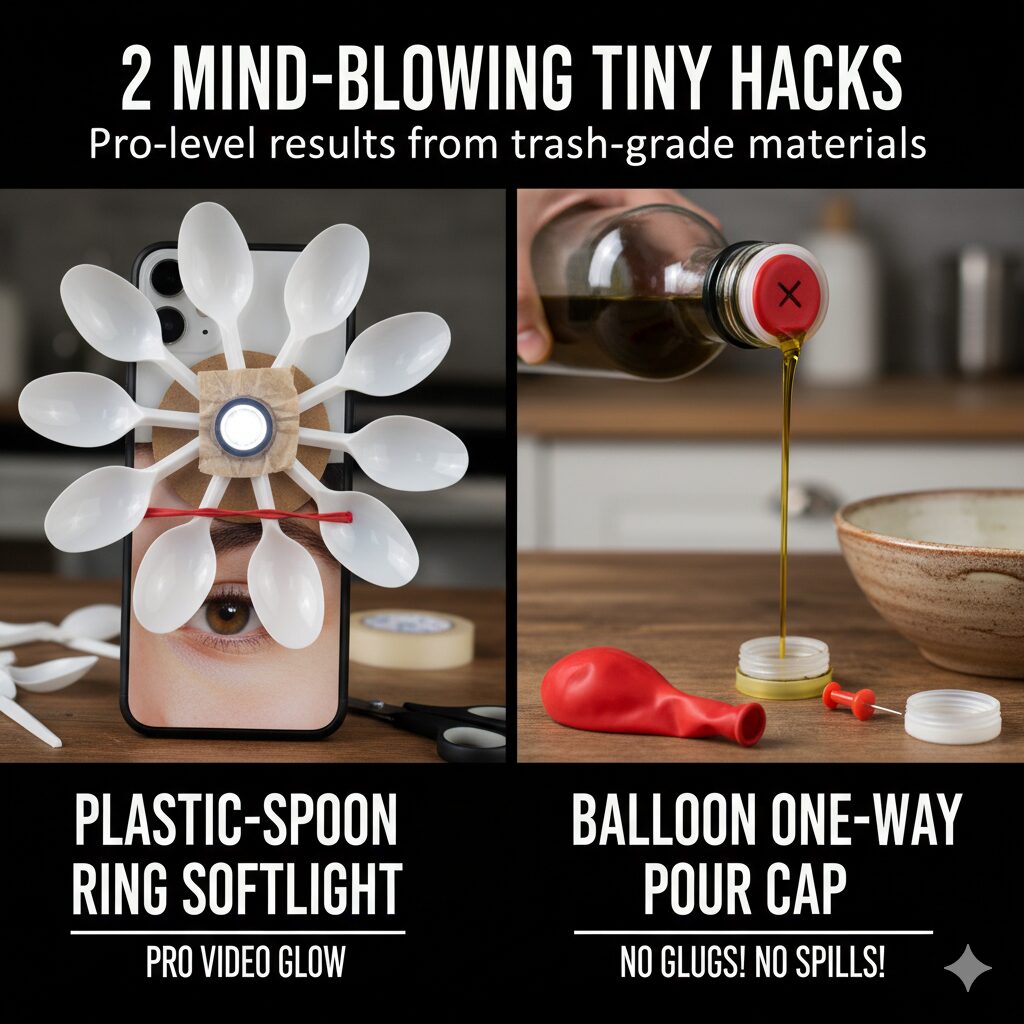
2 Mind-Blowing Tiny Hacks
Pro-level results from trash-grade materials. Full build steps, what each tool does, and the physics that makes them work.
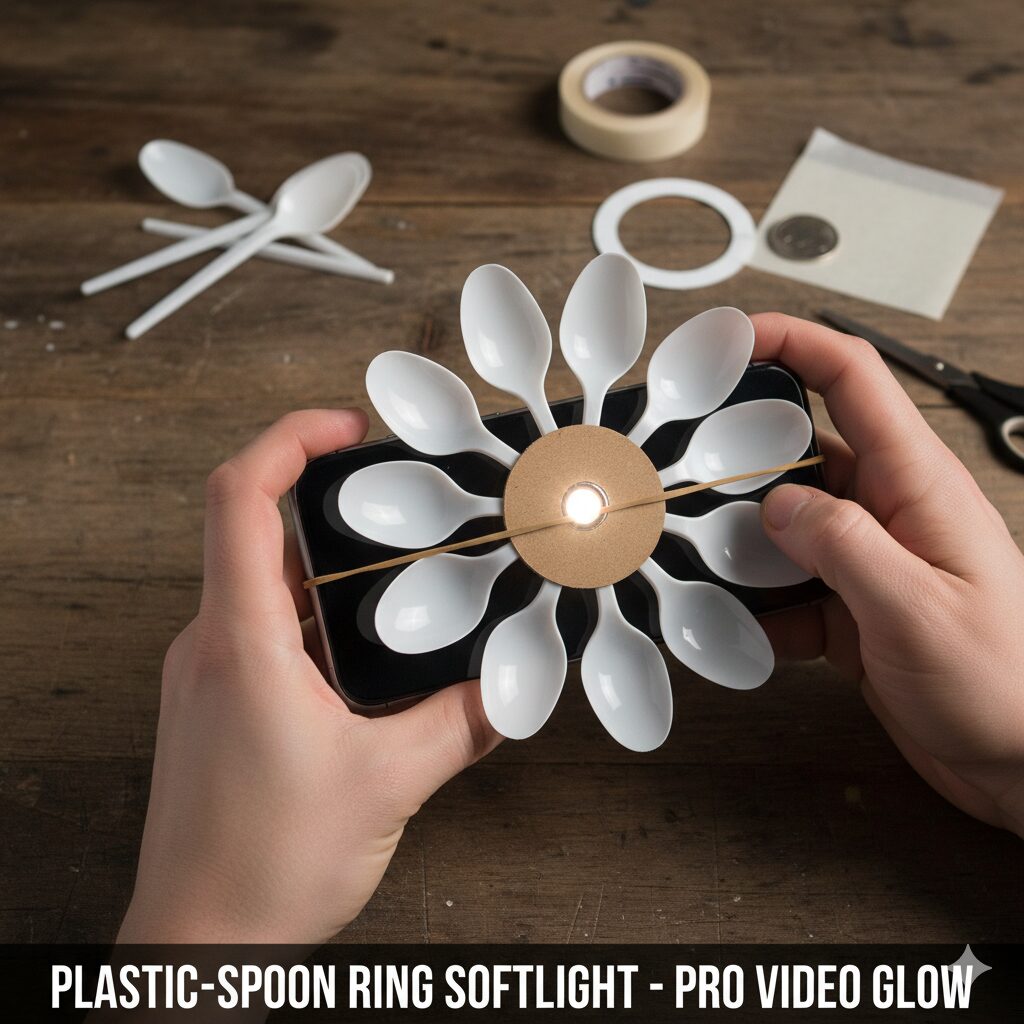
1 — Plastic-Spoon Ring Softlight for Phone Video
Create a soft, flattering ring-like fill light using everyday disposable spoons — no extra power, no expensive gear.
Materials
- 6–9 white disposable plastic spoons (concave side intact)
- Small round cardboard disc (coin size) or thick cardstock circle
- Double-sided tape or hot-glue
- Elastic band (to secure the ring to the phone)
- Optional: a tiny square of greaseproof paper for extra diffusion
Build — 4 clear steps
- Cut the disc: Cut a circular cardboard disc about the diameter of your phone flashlight cluster (roughly coin-size). This is the mounting hub.
- Attach spoons radially: Arrange the spoons radially so their handles meet at the center. Glue or tape each handle to the disc so the spoon bowls form a shallow outward-facing ring. Keep a small center hole open for the flashlight beam.
- Mount to phone: Stretch an elastic band widthwise around the phone and slip the spoon-disc ring under the elastic so the center hole aligns exactly over the phone flashlight.
- Tune the angles: Turn on the flashlight and slightly bend/angle each spoon’s bowl to reflect light forward and outward. For softer light, tuck a thin piece of greaseproof paper across the spoon tips as a gentle diffuser.
What it does (short)
Transforms a harsh point-source phone torch into a wide, ring-like fill light. The overlapping reflective bowls convert a focused beam into many smaller reflected sources that blend into soft illumination.
Why it works — the physics, simply
Each spoon bowl acts as a concave reflector. When arranged in an annular array the concentrated beam hits multiple concave surfaces and re-emits many slightly offset reflections. The human eye and camera sensor integrate these overlapping reflections into a softer, broader light field — similar to the effect of a ring light or softbox but created from multiple tiny reflectors instead of a single diffuser.
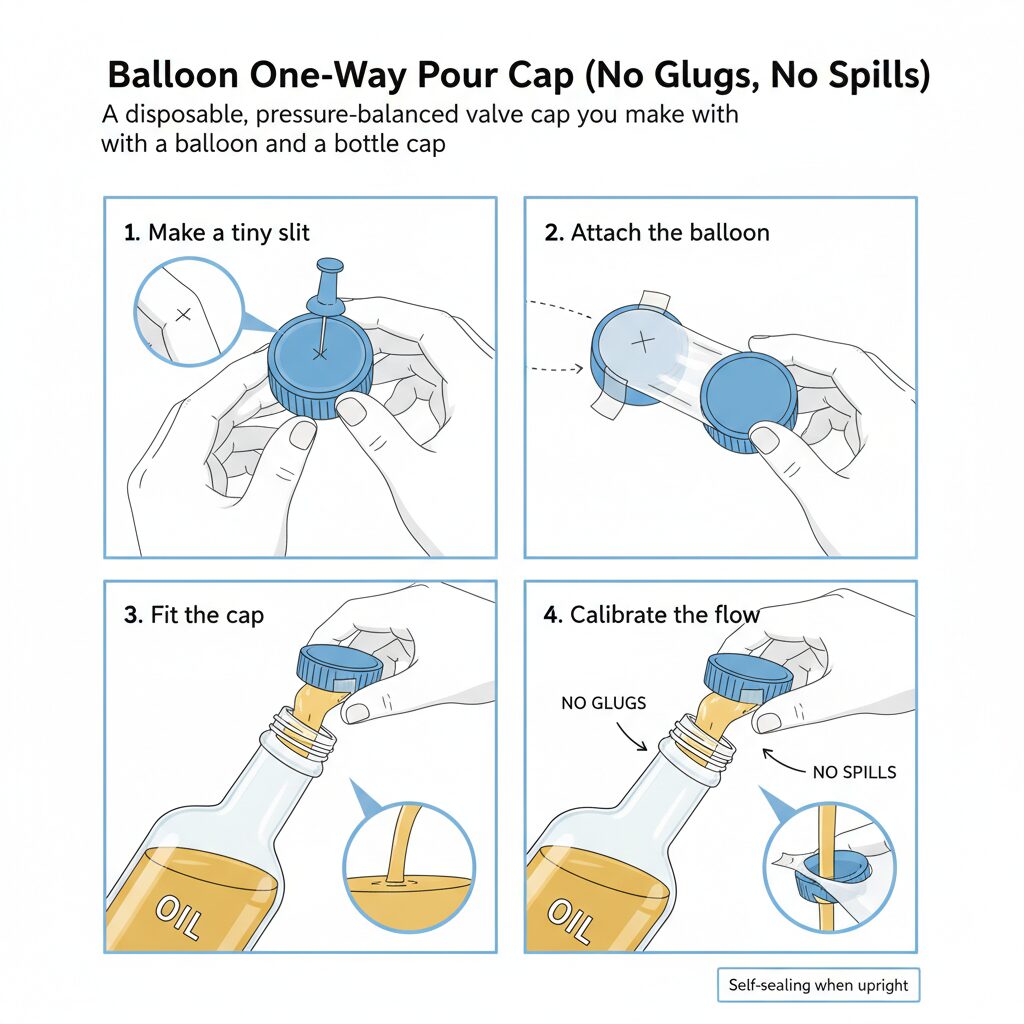
2 — Balloon One-Way Pour Cap (No Glugs, No Spills)
A disposable, pressure-balanced valve cap you make with a balloon and a bottle cap — eliminates glugging and dripping for oils, syrups, and dressings.
Materials
- 1 small new balloon (latex)
- 1 clean plastic bottle cap (matchable to your bottle/jar)
- Push-pin or sharp needle (for the slit)
- Tape (optional, to secure the balloon edge)
Build — 4 clear steps
- Make a tiny slit: Using a push-pin or needle, pierce the center of the cap and enlarge the hole into a small X-slit about 2–3 mm wide (start small — you can enlarge later).
- Attach the balloon: Stretch the balloon across the underside of the cap so the membrane covers the slit tightly from the inside. Tuck or tape the balloon lip to the cap rim so it stays sealed.
- Fit the cap: Screw the cap onto the bottle or press-fit it into the jar neck, ensuring the membrane sits over the liquid outlet.
- Calibrate the flow: Tilt to pour and observe the stream. If it’s too slow, slightly enlarge the slit; if too fast, make a smaller slit. The elastic membrane will self-seal when upright.
What it does (short)
Acts as a simple one-way valve: liquid flows out under pour pressure, but air cannot freely rush in to cause glugging. When you stop pouring, the elastic membrane reseals the slit and prevents drips and inconsistent flow.
Why it works — the logic, simply
The balloon membrane functions as an elastic valve seat. During pouring, pressure from the liquid pushes the membrane aside locally and permits flow through the slit. When you return the bottle upright, atmospheric pressure and elastic recoil press the membrane closed, sealing the opening. This prevents the alternating air-ingress/liquid-egress cycles (the classic “glug”) and yields a steady stream or controlled pour.
Extra pro tips (both hacks)
- Macro close-ups help you check structural symmetry.
- Use minimal adhesive — excess glue can change light spread or block flow.
- Replace components regularly if used with food liquids.
Optional quick reference code (make a spoon ring)
1. Cut 1 cardboard disc Ø ≈ flashlight cluster
2. Arrange 8 spoons radially, glue handles to disc leaving center hole
3. Slip elastic across phone, position ring over flashlight
4. Turn on light, tilt spoons until soft, even coverage
#DIYHacks #LifeHacks2025 #TinyHacks #SmartHomeTips #CreativeDIY #BudgetHacks #GeniusIdeas #UpcycleProjects #HomeTricks #EverydayHacks #SimpleSolutions #DIYCrafts #ProblemSolvingHacks #SmartLiving #QuickFixes

Leave a Reply